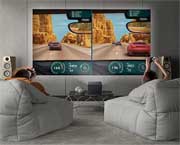
What I love about projectors is that they can eliminate the need for an expensive, heavy and energy-sucking big screen TV.
Pros and Cons: TV vs iPad + Projector
 Yes, we give up the precise definition that we could get from a hi-def TV, and we can’t get cable TV through our computers (not yet, at least). However, we can display a giant movie screen in our living room any time we want and pay a fraction of the cost to operate it.
We can also customize our set-up to be as portable as we’d like – even wireless. Take it to a friend’s house, the backyard, a camping trip. I’d say the sky’s the limit, but we can’t take it that far.
How to Connect an iPad to a Projector:
One of the most common ways to attach an iPad to a projector is through a VGA or HDMI cable.
You will also need a connecting VGA adapter or HMDI adapter, which can be purchased through Apple for between $40 and $50. Then, you simply attach the iPad to the appropriate adapter. Then, subsequently to the HDMI or VGA cable and lastly to the projector.
iPad + Adapter + HDMI or VGA Cable + Projector
VGA vs HDMI: HDMI will transfer the audio from the iPad or other device to the speakers located on the projector. On the other hand, the VGA does not transfer audio. Using VGA, the sound will come out of the iPad speakers. (Keep this in mind if you have a sound system that you prefer.)
The video below shows how to do it step-by-step, using the VGA cable first and then the HMDI cable:
If you watched the clip to the end, you know that there is a third connection option: through Apple TV. The main benefit to this option is that it is wireless.
Going Wireless!
With Apple TV, you don’t have to keep your iPad connected to the projector while you are watching videos or playing games on the big screen. The Apple TV unit plugs into the projector and therefore leaves your iPad (or other device) free to roam around.
This can be a big advantage (and maybe a no-brainer) if your projector is attached to the ceiling or far away from where you plan to sit. The downside is that this option is more expensive than going non-wireless (about $70, or $80 with cable included). That said, if you plan on using the other movie-watching features that Apple TV offers and prefer wireless, this is not a bad deal.
Here’s how to set it up:
Other alternatives to Apple TV include Google Chromecast or Amazon Fire TV Stick, which essentially are HDMI “sticks” that you plug into the HDMI outlet of your projector (or TV for that matter). They allow users to wirelessly stream content that is on their ipad/phone/laptop browser onto the projector screen. Roku is yet another option.
Although choosing your connection device may require some thought, connecting an iPad to a projector is ridiculously simple. You don’t need much. In fact, this page shares 10 ways to do it, including ones we mentioned above and software programs that you can download online.
Note: Although many software programs are a cheaper option than using the Apple TV, they do require a laptop or computer to be connected to the projector at all times. You can then wirelessly show data from a tablet or iphone on the computer screen which projects through the projector, but it’s one additional step. Something to keep in mind.

